


This post is also available in:

A workshop visit costs.
This hurts most when it comes to small routine maintenance/repairs, which can be done easily with a little courage and only one left hand ;-).
This starts with changing brake shoes and ends with changing fluids (except brake fluid!).
What is needed for this?
– Sufficient time,
– Youtube 😉 and/or a workshop or service manual as a guide and preparation for
o The work steps,
o Necessary spare parts to order and
o Required tools
– a flat parking surface,
– when changing liquids, an absorbent pad or a closable collecting container,
– Workshop gloves,
Most motorcycle manufacturers now have spare part drawings on their pages,
These make it relatively easy for us to identify spare parts and to shop online. Alternatively the good old visit to the next brand workshop/dealer works as well.
e.g.
First, you should be looking for a quiet place. With short repairs it can also work in a normal parking lot, but it is better to have your own place like a garage, a parking space or a workshop etc., especially during the first attempts.
Weather surprises must be taken into account.
It is best to arrange the workplace in such a way that:
– Its clean and as dust-free as possible.
– The probably needed tools are ready in an orderly way
– There is a shell (ideally magnetic) for screws, nuts and washers, so that they do not get lost (place the shell so that an accidental knocking over is unlikely) 😉
– All spare parts and gaskets, checked them for completeness and put them close. Detto all new liquids.
– Gloves and cleaning paper, as well as a waste bag or waste bucket are within reach.
Prepared in this way, absolutely nothing can go wrong.
So courage, let’s start the first operation.
As teaser: oil and filter change!
In the service manual on the last pages the required quantities and the type of oil used are indicated.
Motorcycles, with the divided lubrication circuit of gearbox, clutch and engine, are very sensitive to deviations from the specifications (primarily because of the clutch!).
Other companies/brands are OK.
Personally I have had great experiences with MOTUL oils, but this may only apply to my motorcycle, so no guarantee 😉
If also the oil filter is to be exchanged, the data for it can be found at any time in the Internet.
If all parts are available, it is time to prepare everything.
Ideally the motorcycle should be warmed up before (the oil becomes thinner), or the engine should be warmed up briefly at the stand. (Caution: the exhaust will be warmer than the engine)
A suitable screw- or ring wrench is required to open the oil drain plug (normally on the underside of the engine/gear block) or very low on the side.
In order to collect the oil that is draining off, a sufficiently large collecting vessel should be placed underneath, which ideally should additionally stand on a mat in order to collect unavoidable splashes.
 Take care with the screw that it does not fall into the tub in the final unscrewing (which should go quickly – because: hot and greasy) and is drowned under the oil. Otherwise: Have fun searching!
The oil will now drain off. Towards the end, it is recommended to tilt the motorcycle slightly so that as much of the remaining oil as possible can drain off.
Excursus filter exchange (skip if this is not necessary. 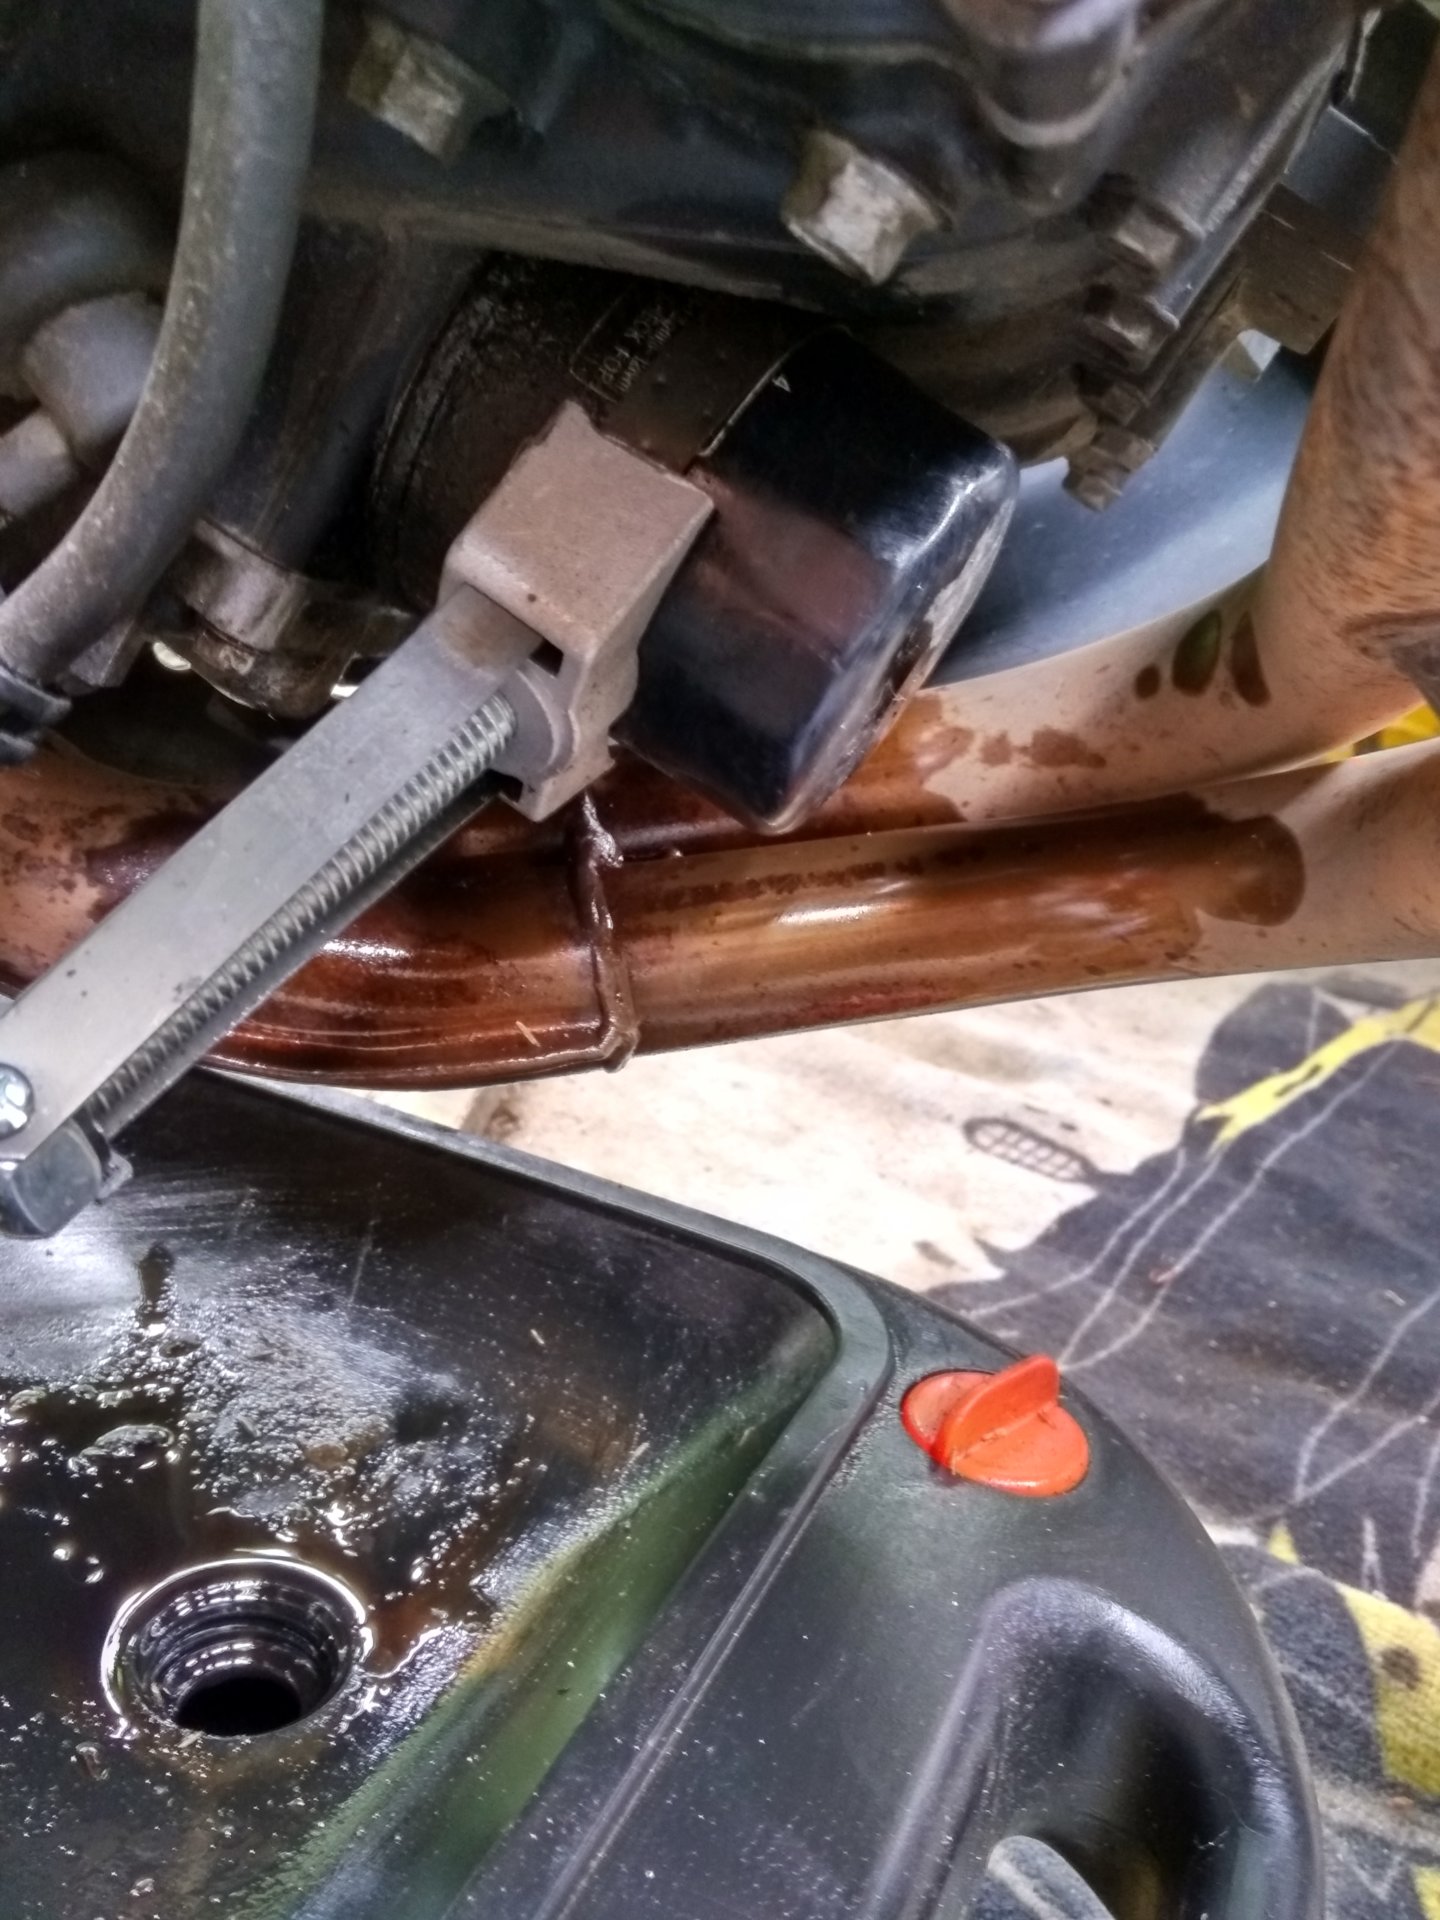
In any case it is recommended to change the filter at least every 2nd oil change.)
Loosen the oil filter counter clockwise with an oil filter key (Attention: small one, not the one for cars!).
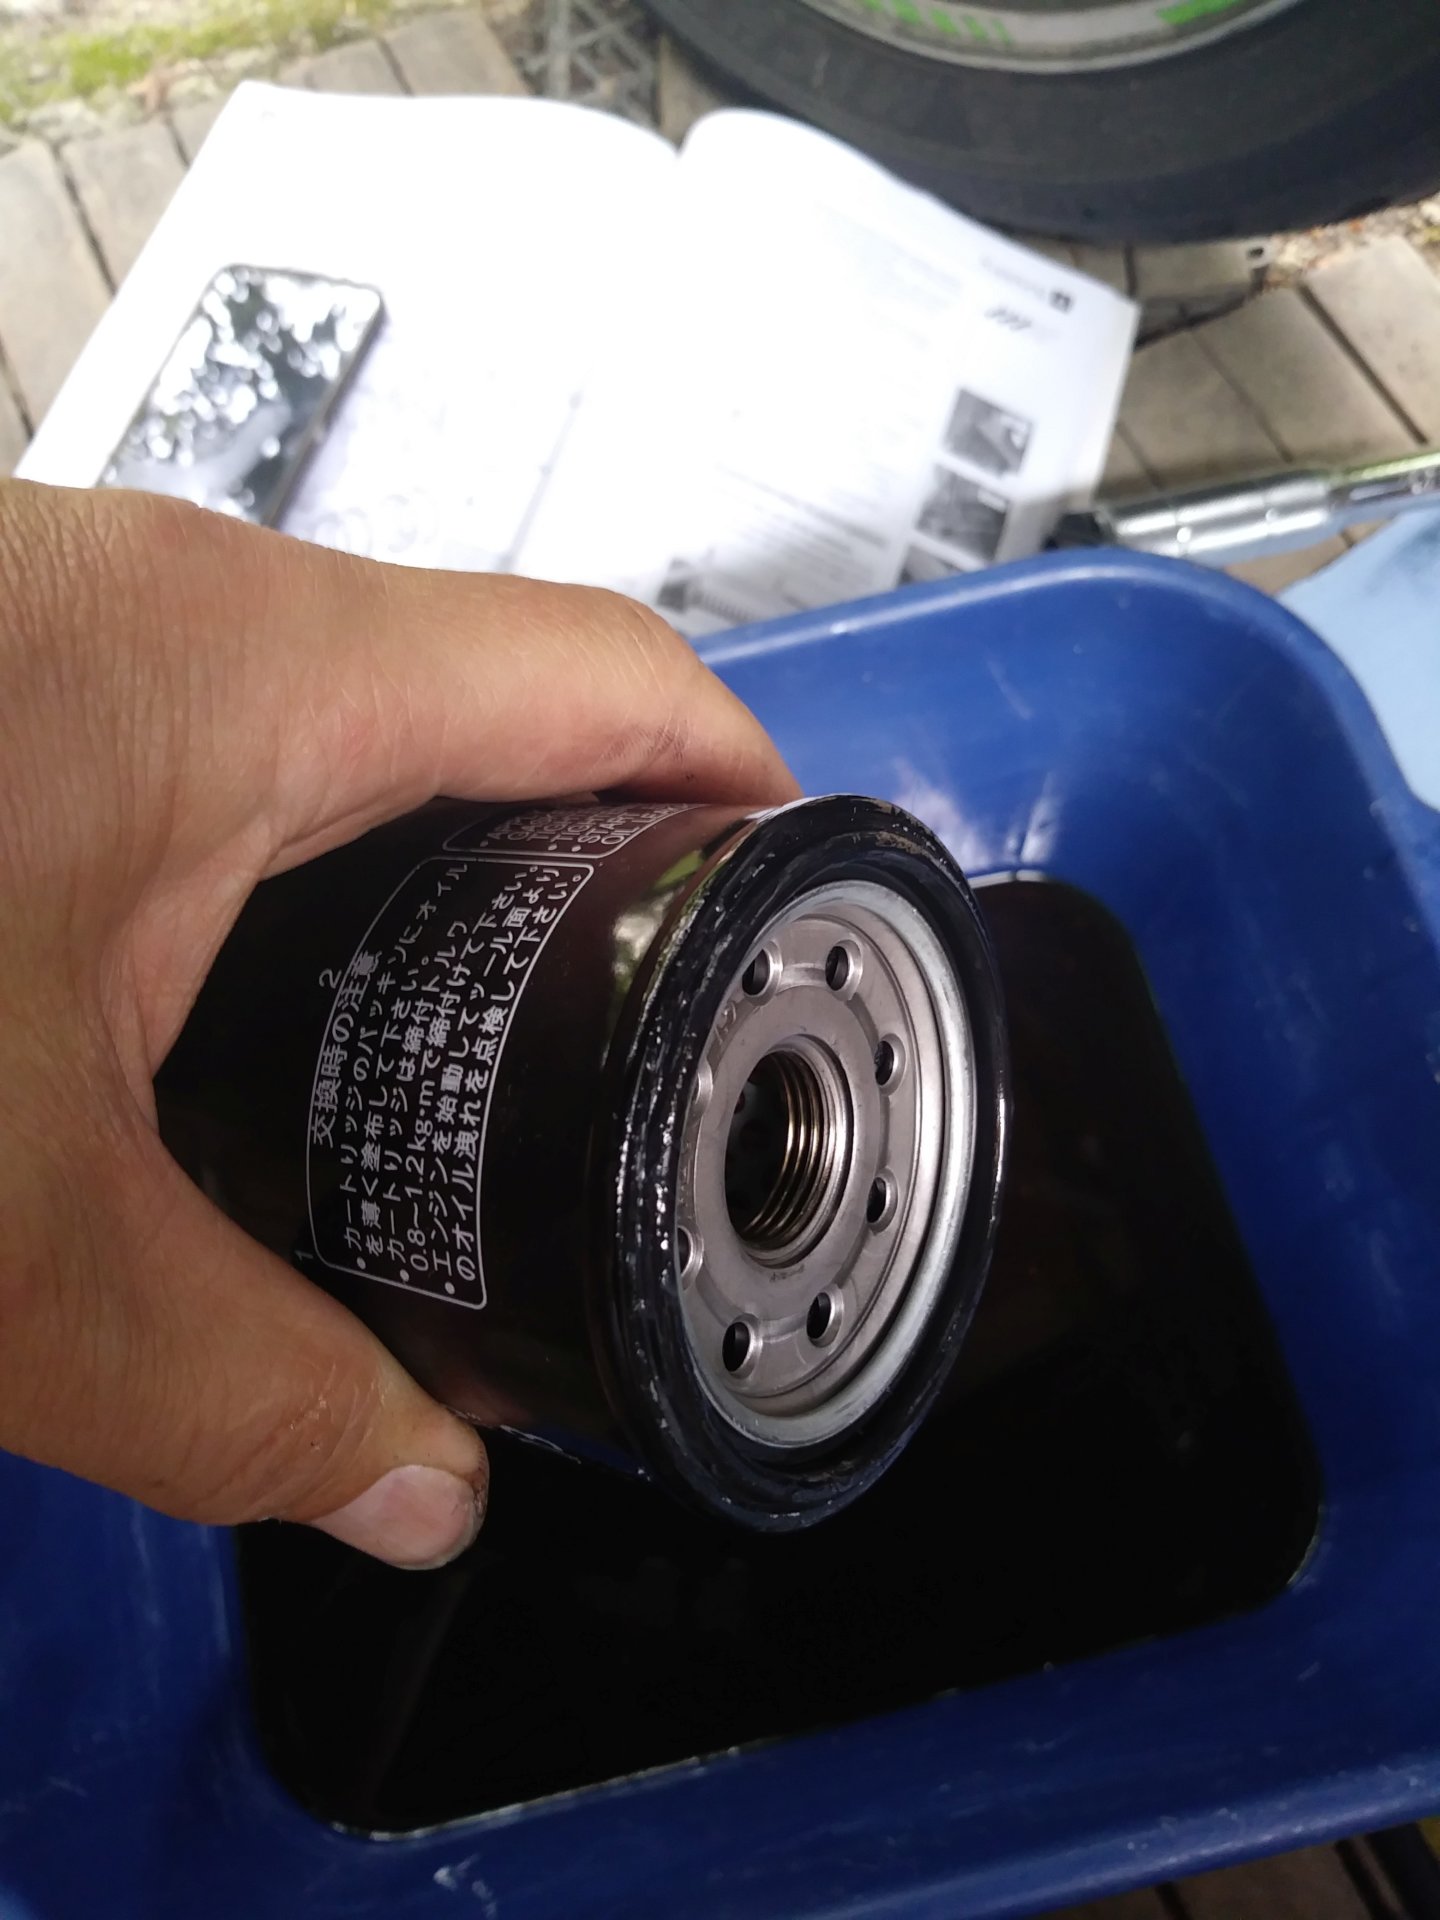 Normally the filter should not sit too tight and go off.
If it is quite stubborn, or if there is no oil filter key at hand, a more resolute method also helps:
Simply pierce the filter with a large screwdriver (using a hammer) and use the screwdriver as a lever to open the filter. This always works.
In any case there will be another short swall of oil, therefore attention and put something beneath to catch the oil.
Drain off the oil, clean both openings with cleaning paper and screw on the new oil filter (attention: remove any protective cover from the seal), a little more than hand-tight.
End Excursus Filter
*Here it goes on if the clutch facings have to be replaced, but that’s another story. 😉
Then also screw in the oil drain plug and tighten it firmly.
Now you can fill in fresh oil again (pay attention to quantity and type). Take a little less into account with the quantity, because residual quantities always remain despite all the work and so the actually required filling quantity is smaller.
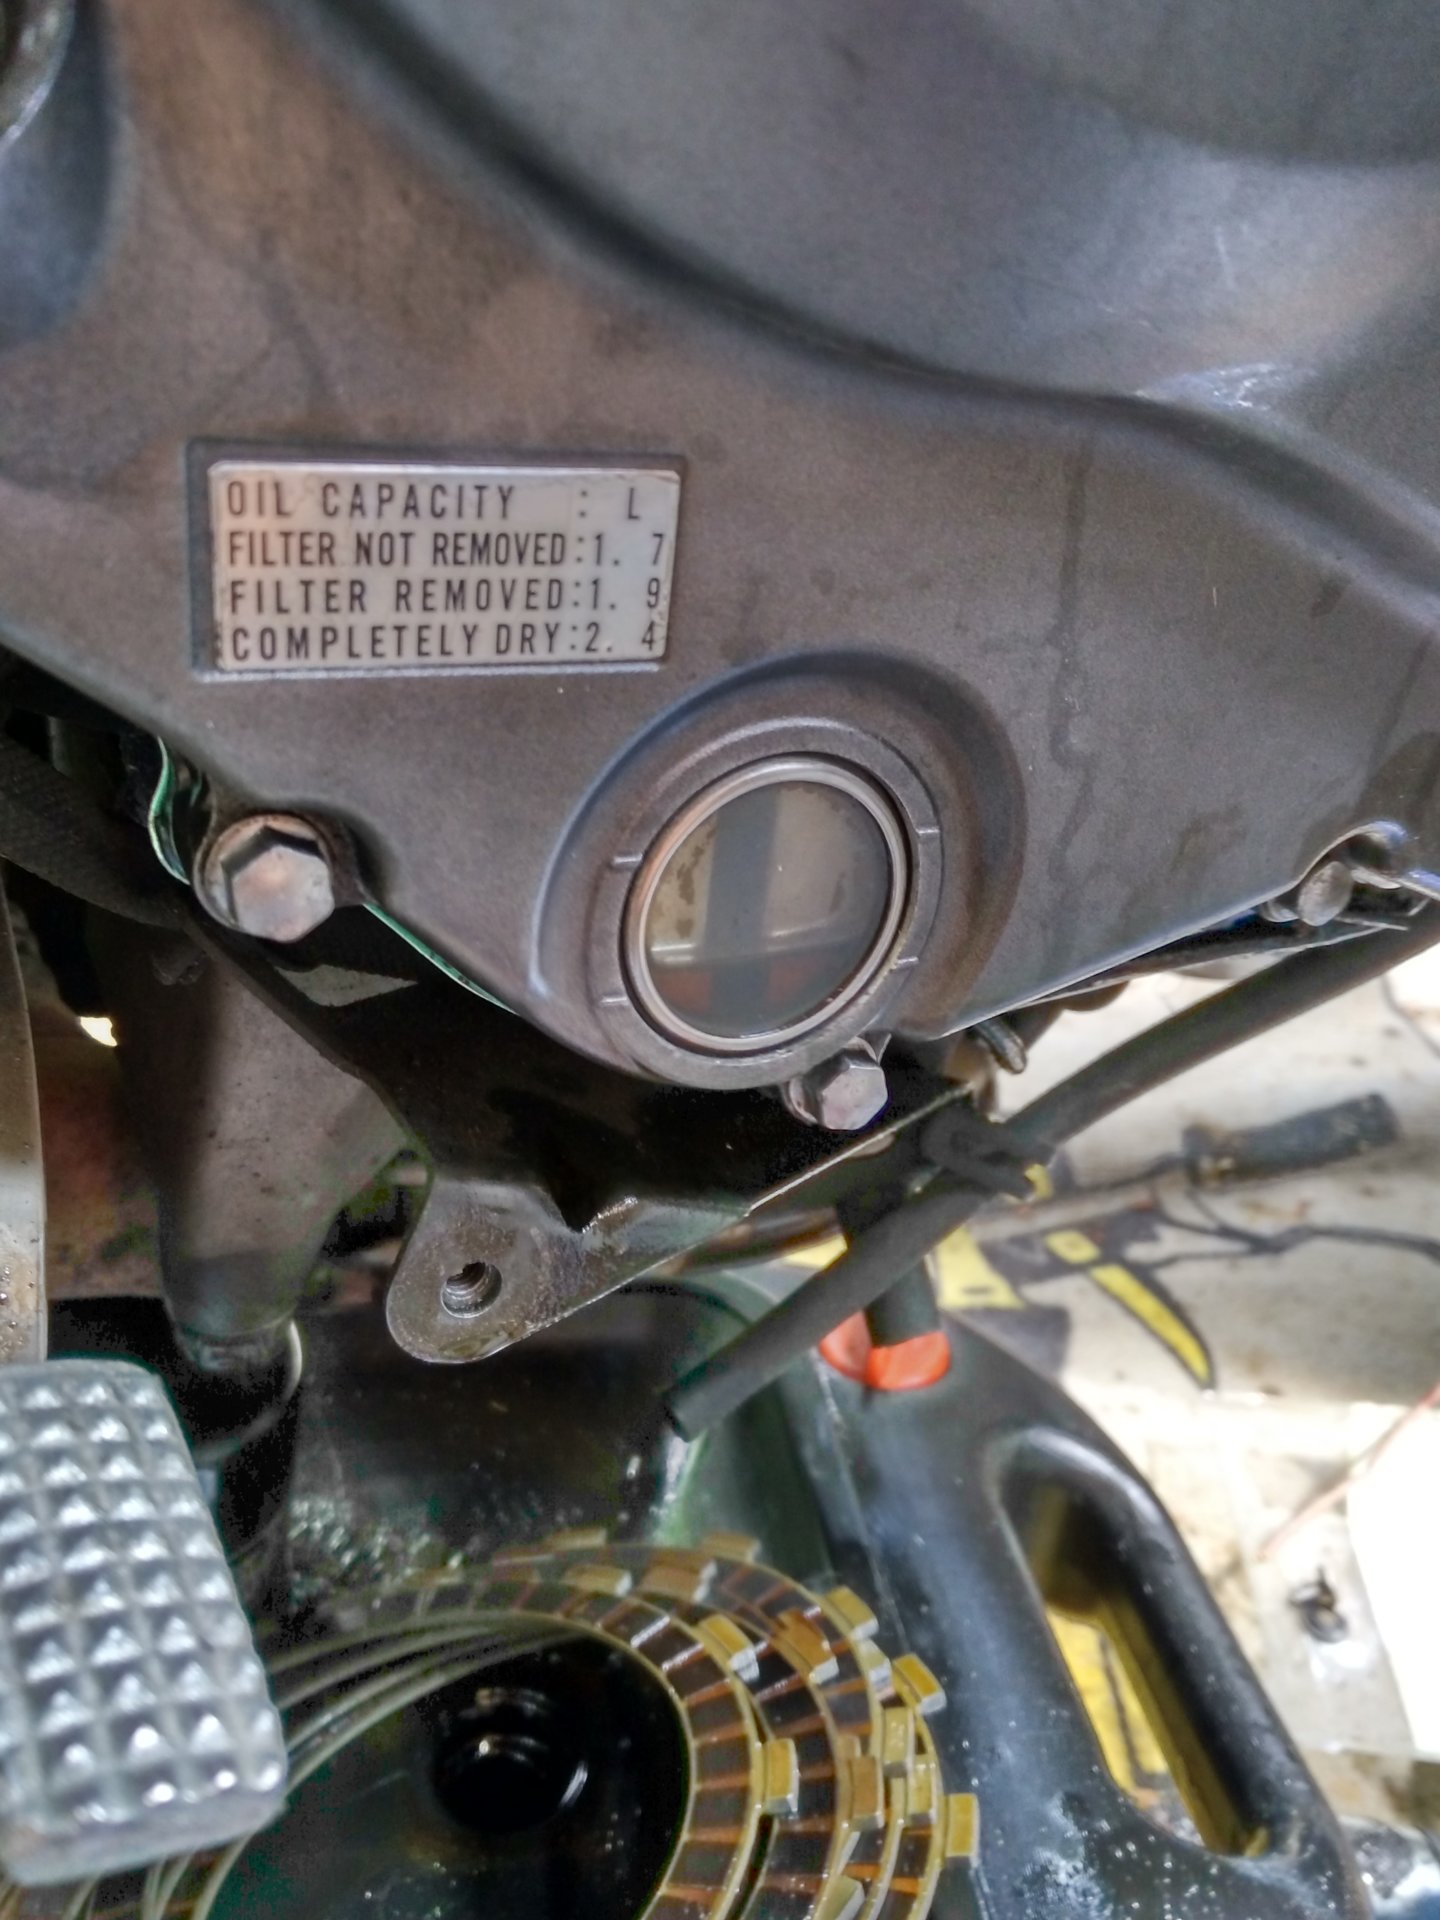 In the finale set up the motorcycle as straight as possible and check the oil level in the oil sight glass.
If the bike is relatively new, you can use the lower mark (little loss of oil to be expected during operation), otherwise you can use the middle mark, or in between 😉
Never fill it up to the upper mark. As the oil expands as a result of heating and can therefore easily exceed the upper mark. That would be bad again.
I.e. check the level after the first test run. (Switch off the engine, straighten the motorcycle upright, wait a while so that the oil calms down and coagulates).
If it was too much, let it go a little bit.
Otherwise. Have fun! That was your first successful oil change!
No warranties, though!
[foogallery id=”4730″]
